A thumb pressing the inner edge of a bare foot resting on a teal towel

How to use

How to use your tool

Short steps for four areas: lower back, knee, pain down the leg, and feet. Sit down and take your time.

Start here

Watch this first

In this short video, Nguyen Duy Phong shows how to hold the tool and how firm to press. Watch it once before you try a routine.

Pause and replay it as often as you like.

More lessons on YouTube

Know your tool

Two ends, two jobs

Your tool is shaped like a Y. Each end does a different job.

  • The two tips

    Each leg of the Y ends in a small round bead. Use one tip for small spots, like the hollow below your ankle bone.

  • The beaded head

    The rounded end has a cluster of small beads. Press or roll it over broad areas, like the arch or the heel pad.

  • Looking after it

    Wipe it with a soft, dry cloth after each use and keep it dry. Don't soak it in water.

Before you begin

Four things to know. They matter more than which spot you press.

  • How to hold it

    Hold the tool in your whole hand, not your fingertips. If your fingers are stiff, wrap them around the rounded end and press with a tip.

  • How firm

    Firm but comfortable. You should feel pressure, not sharp pain. Lean in a little of your weight instead of squeezing.

  • How long

    Start with 30 seconds on each spot. Breathe slowly while you press. A full routine takes about 3 minutes.

  • When to stop

    Stop if you feel dizzy or numb, or if the pain turns sharp or gets worse.

Talk to your doctor first if you:

  • are pregnant
  • take blood thinners, or bruise easily
  • have an open wound, cut, rash, or bruise on the area
  • have varicose veins or a blood clot in the leg
  • have lost feeling in your feet (for example, from diabetes)
  • had surgery, a fracture, or a joint replacement in that area recently
  • have pain that came on suddenly, or pain with fever, weight loss, or loss of bladder control

Never press directly on a wound or broken skin.

Four routines

Pick the area that bothers you most. Sit somewhere steady, and rest your foot or leg on a cushion if that helps.

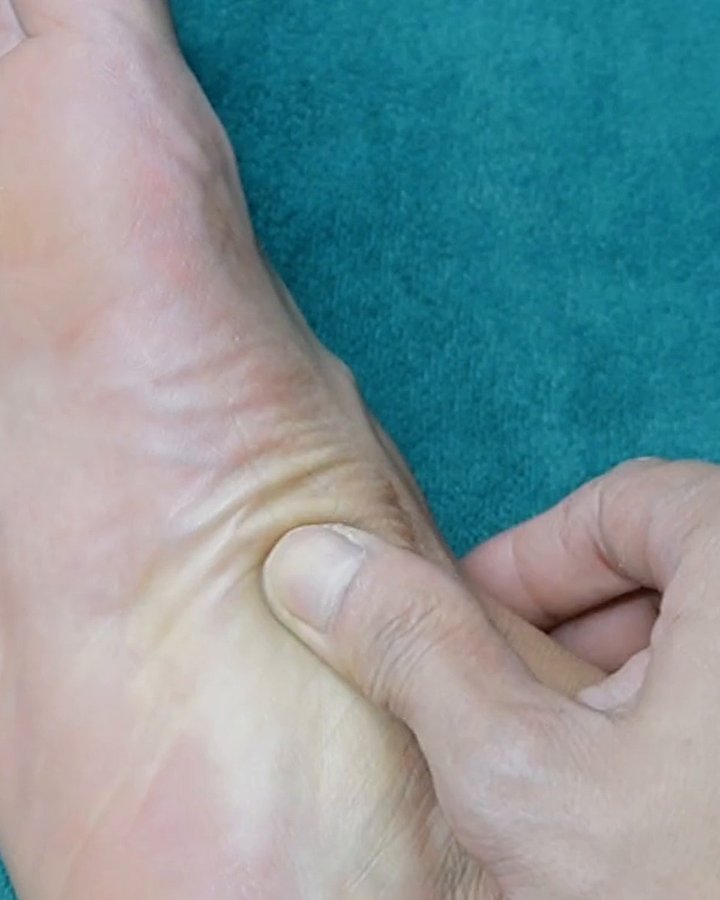
A thumb pressing right below the inner ankle bone of a bare foot resting on a teal towel
Below the inner ankle bone
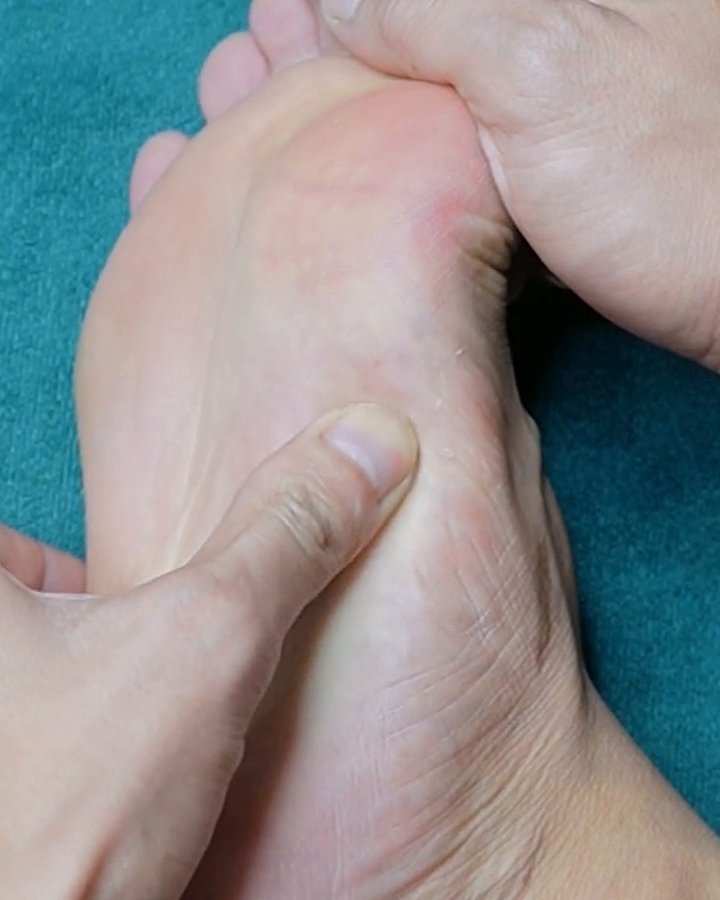
A thumb pressing the inner edge of a bare foot, in front of the heel
Along the inner edge of the foot

Routine 1

Lower back

About 3 minutes, sitting down

  1. Sit down and rest one foot across your other knee, or on a low stool.
  2. Find the bony bump on the inside of your ankle. Place one tip in the soft hollow right below it.
  3. Press firm but comfortable for 30 seconds. Breathe slowly.
  4. Move along the inner edge of your foot, from the heel toward the big toe. Press each spot for a few seconds.
  5. Switch feet and repeat.

In our method, the inner edge of the foot mirrors the spine. Go slowly along it.

A thumb pressing into the soft hollow at the edge of the kneecap
The hollow beside the kneecap
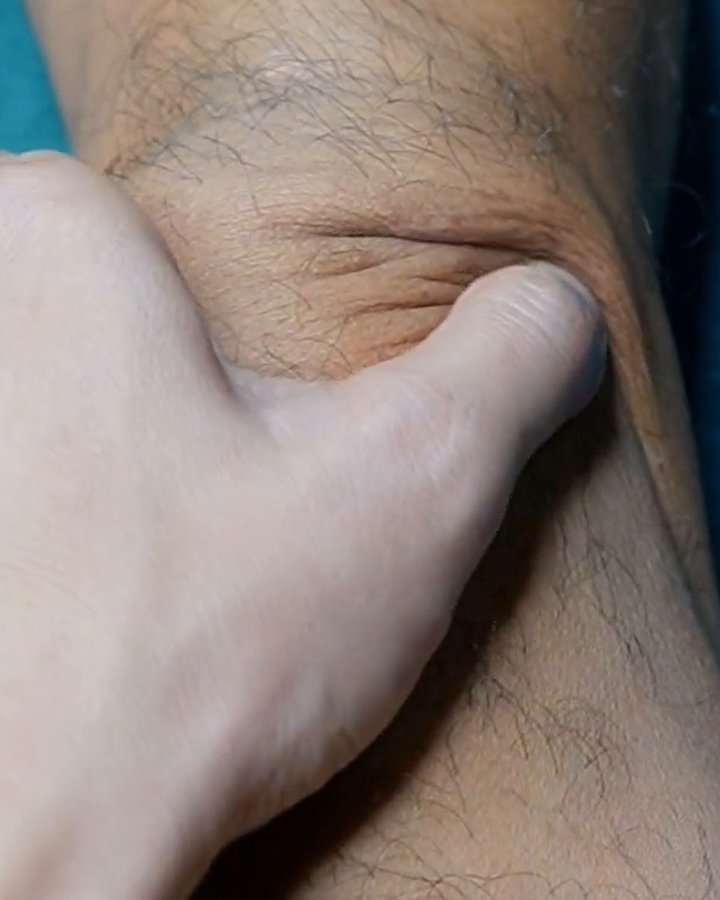
A thumb pressing gently into the crease right above the kneecap
Right above the kneecap

Routine 2

Knee

About 3 minutes, sitting down

  1. Sit on a chair with your foot flat on the floor and your knee bent.
  2. Find the two soft hollows on each side of the kneecap, near its lower edge.
  3. Press one hollow with a tip for 30 seconds, then the other.
  4. Press the crease right above the kneecap for 30 seconds.
  5. Repeat on the other knee if it bothers you too.

Keep the pressure gentle around the kneecap. Skip a knee that is swollen, red or hot, and ask your doctor about it.

A thumb pressing the hollow behind the outer ankle bone, next to the heel
Behind the outer ankle bone

Routine 3

Pain down the leg (sciatica)

About 3 minutes, sitting down

  1. Sit down and cross one ankle over your other knee.
  2. Find the bony bump on the outside of your ankle. Place one tip in the hollow between that bump and your heel.
  3. Press firm but comfortable for 30 seconds.
  4. Find the crease behind your knee. Press its middle gently with the beaded head for 30 seconds.
  5. Do the side that hurts first, then the other side.

The crease behind the knee is tender. Use light pressure there.

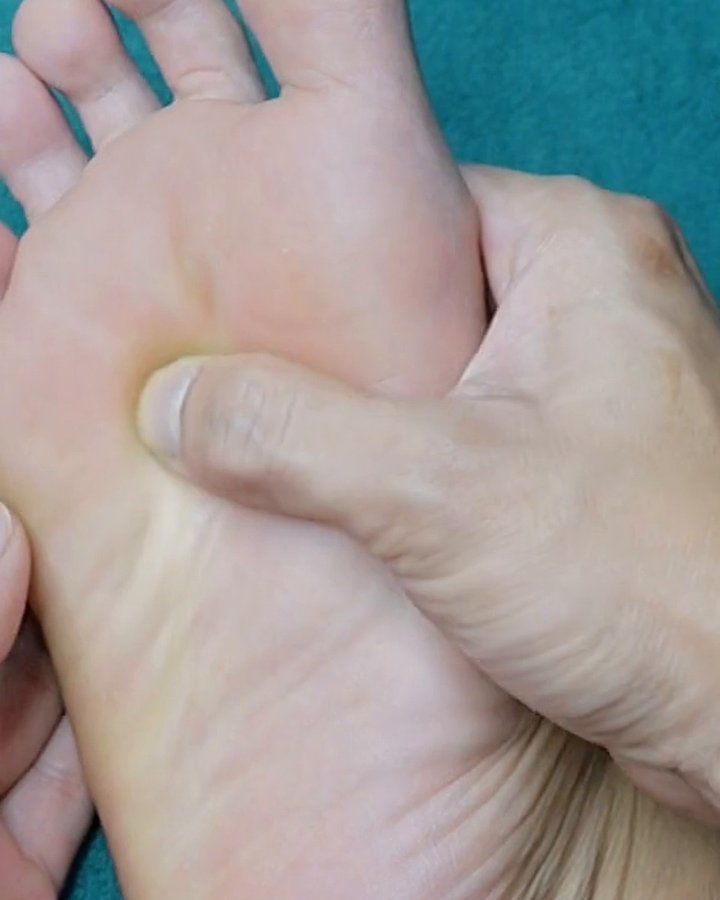
A thumb pressing the arch of a bare foot while the other hand holds the toes
The arch
A thumb pressing the pad of the heel on the sole of a bare foot
The heel pad

Routine 4

Feet

About 3 minutes, sitting down

  1. Sit down and rest one foot across your other knee.
  2. Press the ball of the foot, right below the toes, with the beaded head. Move slowly across it.
  3. Press along the arch, one spot at a time, for a few seconds each.
  4. Press the heel pad with the beaded head for 30 seconds.
  5. Switch feet and repeat.

If your heels ache in the morning, you can do this sitting on the edge of the bed, before you stand up.

Don't have the tool yet?

Every order comes with these lessons. Free shipping. Ships in 10–20 business days.